6 Chapter 6 – Bread and Rolls
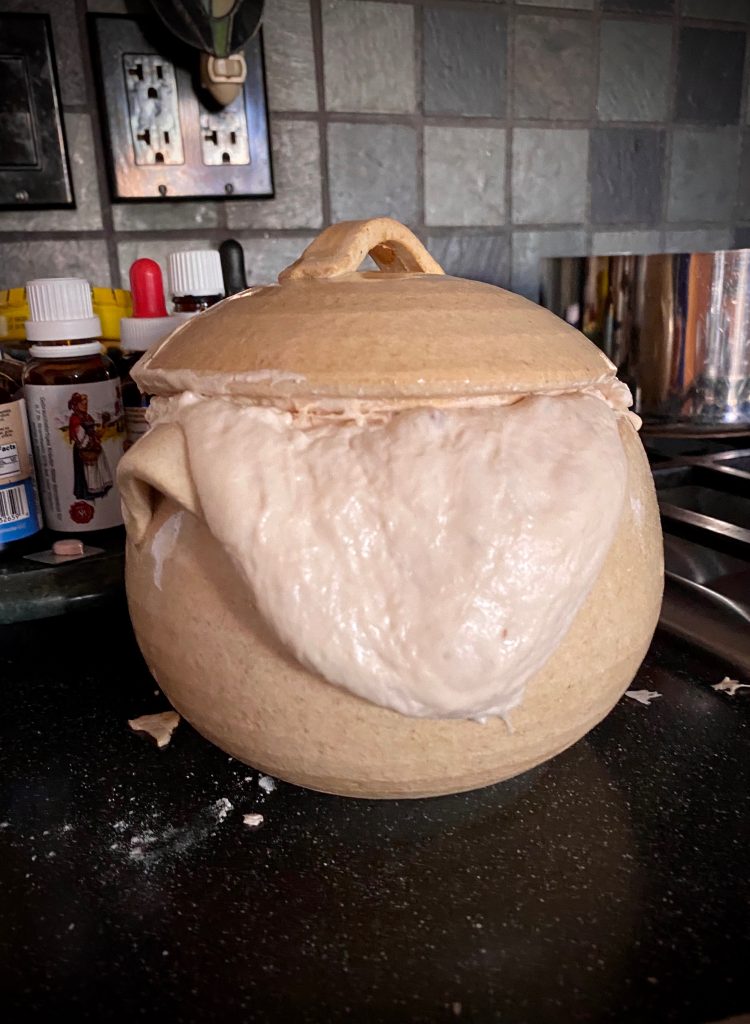
How to Make a Sourdough Starter (Mother)
Betsy Bird
If there is any one food to best represent the COVID-19 pandemic it is not bread, but that primordial ancestor to bread itself. Many of us found ourselves suddenly (and unaccountably) curious about sourdough starters when our grocery stores were bereft of any kind of yeast. How hard could it be to pluck microbes from the air to do our bidding anyway?
I found the best sourdough starter recipe in the book Wild Bread: Flour + Water + Air by MaryJane Butters. I’ve adapted some of her advice here and added a little of my own. If you wish to raise your own “mother”, try the following.
Equipment
- A variety of glass bowls with tight fitting lids
- A couple baking dishes
- 3-5 28″ X 28″ cotton towels
- Measuring cups
Ingredients
- Flour – You may find it easier to start your mother with organic heirloom flour (which you can actually find it vast quantities in the Valli grocery store). I find that unbleached flour works just as well. Feel free to experiment with kamut or einkorn or einka wheat, if the unbleached flour doesn’t seem to be working for you.
- Purified Water – On my first couple tries I discovered that water from my Brita filter just wasn’t doing a great job. I switched to buying a gallon of purified water and it made a HUGE difference!
Preparation
You’ll be keeping a glass bowl on your counter (or, in my case, in an upper cabinet) pretty consistently for a week. Here’s how to get started:
- Pour 1/2″ purified water into your baking dish. Soak one of the cotton towels in it. Set aside.
- Add 3/8 c. flour and 1/4 purified water into your bowl. Stir thoroughly with a spatula until mixture is smooth and relatively free of lumps.
- Wring the water from your towel into the baking dish. Place your bowl inside the baking dish and cover with the towel, tucking the edges into the water. Always keep purified water in the baking dish so the water can keep the towel moist.
- In the evening repeat step 2 and tuck your mother in. Now do this two times every day, every morning and evening for six days. Always make sure the dish has plenty of water. Keep your mother in a warm dry place. I like to put mine in my upper cupboards where the heat rises.
- On the seventh day your mother should be alive with bubbles and smell pleasantly sour like stout beer. If it’s not ready yet, turn some of it into pancakes or waffles and give the rest (at least half a cup) another week. After two weeks you should be ready to try a batch of bread. From here on in you’ll keep some of your starter in the fridge, where you “feed” it once a week.
- Note: I found that once the starter is bubbling and good to go, you don’t need the towels anymore. Starters don’t like air, so if you can make the bowl airtight with some kind of a lid, that is perfect! Now find yourself a good sourdough bread recipe book and go wild!
*
Tutmanik (Bulgarian bread)
Kristina Grigorova
The idea for the cookbook is great and we would like to participate with a very easy recipe for a Bulgarian bread-like dish. Our 4 year old son likes to make it for breakfast.
I can’t wait to see the book and try the recipes of our neighbors. I’m sure it will be full of interesting recipes from all over the world.

Ingredients
- 3 eggs
- 1 c. yogurt
- 1 tsp. baking soda
- 1/2 c. vegetable or sunflower oil
- ~3/4 to 1 c. flour
- 4-5 oz. feta cheese
Preparation
- Grease and flour a baking pan.
- Mix all the ingredients except for the flour and feta cheese in a bowl.
- Then start adding the flour little by little while continuing to stir. The batter will be similar to that of a cake.
- Add the crumbled feta cheese.
- Pour in the batter and bake at 380 degrees until it becomes golden.
*
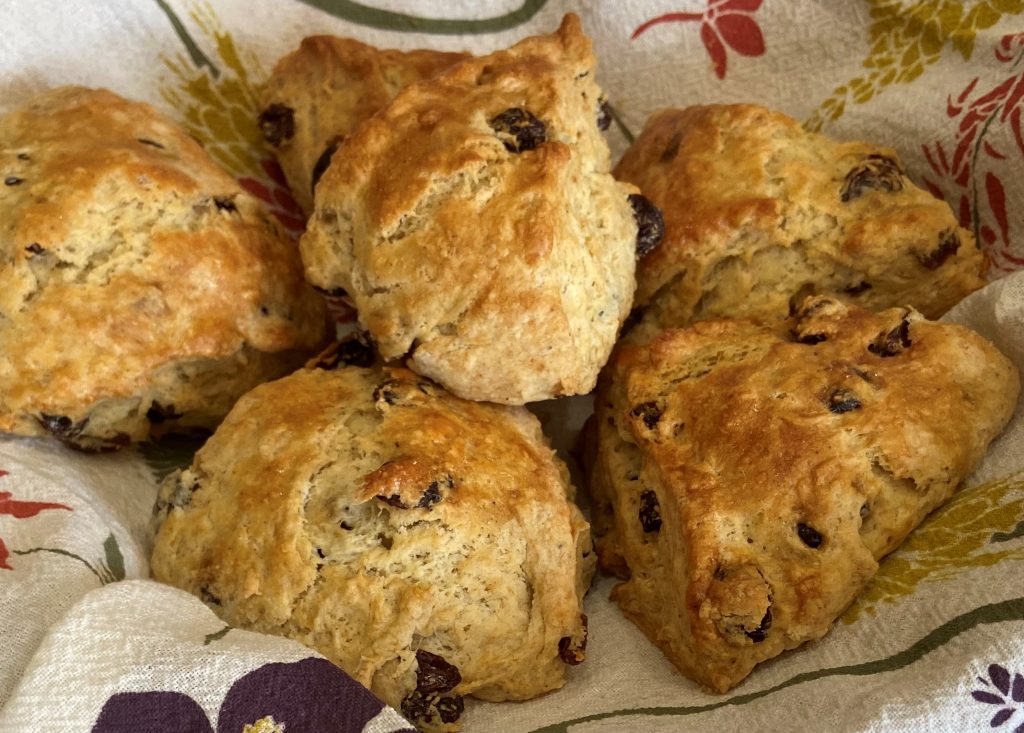
Raisin Scones
Julie Rand
I’m a librarian at the Evanston Public Library and one of my hobbies is baking. This scone recipe is one of my family’s favorites and a treat I used to make on weekends. Now I can make them every day if I like!
Scones are traditionally served with tea in the afternoon, however, we usually have them at breakfast; served plain, or with butter and/or raspberry jam. They’re very easy to make and, unlike many scone recipes, are not too sweet and even more important, are very light and flakey. You can substitute the raisins for any other dried fruit, or omit them altogether.
Yield: 12 scones
Ingredients
- 2 c. flour
- 2 tsp. baking powder
- 1/2 tsp. baking soda
- 1/2 tsp. nutmeg
- 1/2 tsp. salt
- 2 Tb. sugar
- 1 stick of cool but not hard butter (1/2 c.), do not substitute margarine!
- 1 c. raisins
- 3/4 c. buttermilk or yogurt
- 1 egg yolk
Preparation
- Combine the dry ingredients in a large bowl.
- Work the butter into the mixture until crumbly.
- Lightly toss the raisins in the flour mixture.
- Mix together the egg yolk and buttermilk or yogurt, and add to the flour mixture, stirring until just combined. Do not overmix or the scones will be too dense.
- Knead the dough 12 times. Cut the dough in half and pat each piece into a round. Cut each round into six pieces and place on an ungreased cookie sheet.
- Bake for 18-22 minutes at 375 degrees.
Optional: brush the scones with a lightly beaten egg white mixed with a teaspoon of water, and, if you wish, sprinkle with sugar.
*
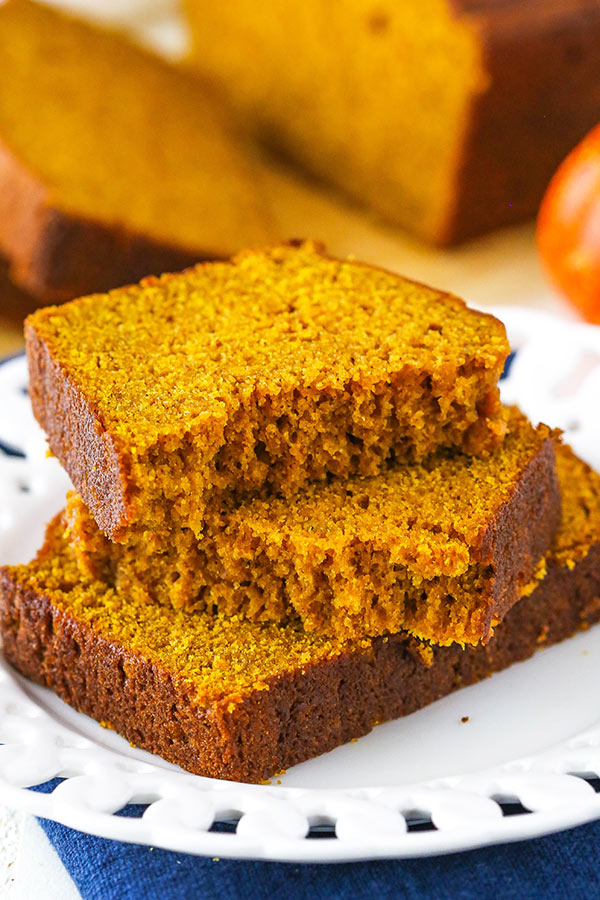
Pandemic Pumpkin Bread
Elizabeth Stover
- 1 c. vegetable oil
- 2-2/3 c. sugar
- 4 large eggs
- 2 c. (or 1 can) pumpkin
- 2/3 c. water
- 3 1/3 c. flour
- ½ tsp. baking powder
- 2 tsp. baking soda
- ½ tsp. salt
- 1 tsp. nutmeg
- 1 tsp. vanilla
- 1 c. chopped walnuts or pecans (optional)
- 1½ c. mini chocolate chips (optional)
Preparation
- Cream together the oil and sugar.
- Beat in the eggs, pumpkin and water.
- Add flour, baking powder, baking soda, salt, nutmeg and vanilla, stirring to blend.
- Mix in nuts and/or chocolate chips. (It’s also great with no additions at all.)
- Pour the batter into two lightly greased 9×5 loaf pans. Bake in preheated 350º oven for 1 hour or until thin knife inserted in center of each loaf comes out clean.
- Cool bread for 10-15 minutes, and then remove from pans. This also freezes well for several months.
*
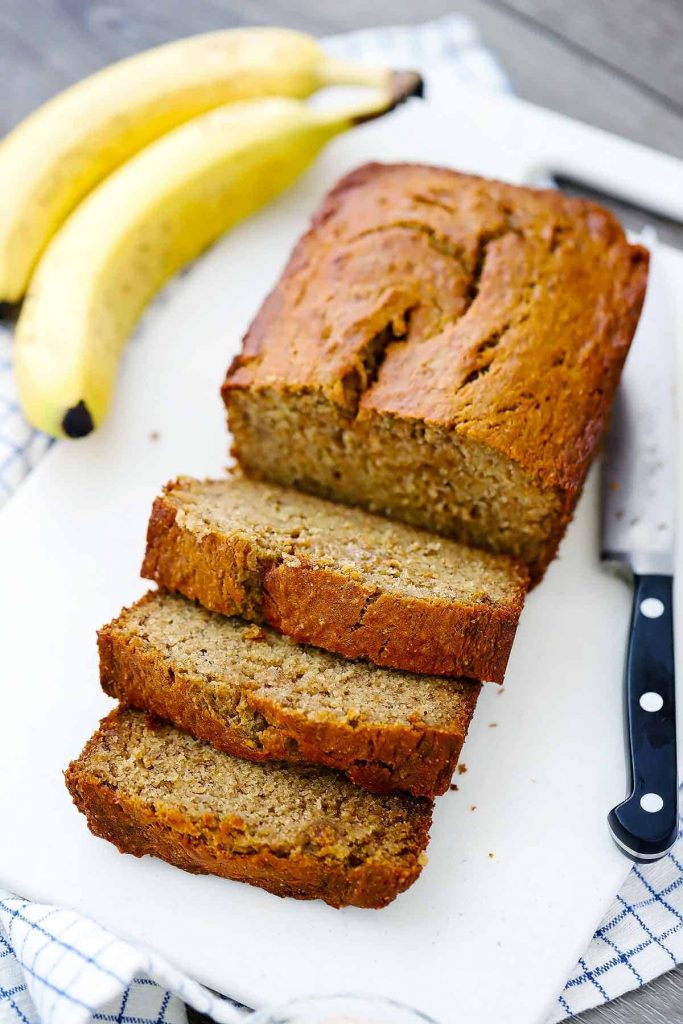
No Mixer Banana Bread
Ingredients
- 3-4 ripe bananas, mashed
- 1/3 c. melted butter
- 1 c. sugar
- 1 egg, beaten lightly
- 1 tsp. vanilla
- 1 tsp. baking soda
- pinch of salt
- 1 ½ c. all-purpose flour
- handful of chopped nuts OR chocolate chips OR blueberries
Preparation
- Heat oven to 350 degrees.
- Butter a 4 x 8 inch loaf pan.
- Beat the bananas with a wooden spoon until soft.
- Mix in the melted butter, sugar, egg and vanilla.
- Sprinkle the baking soda and salt over the banana mixture, and mix in with a wooden spoon.
- Add the flour until combined and then stir in the nuts, chocolate chips or blueberries.
- Pour into the prepared pan and bake for approximately one hour, or until a toothpick inserted into the center comes out clean.
- Cool on a rack for 10 minutes before removing from the pan.
*
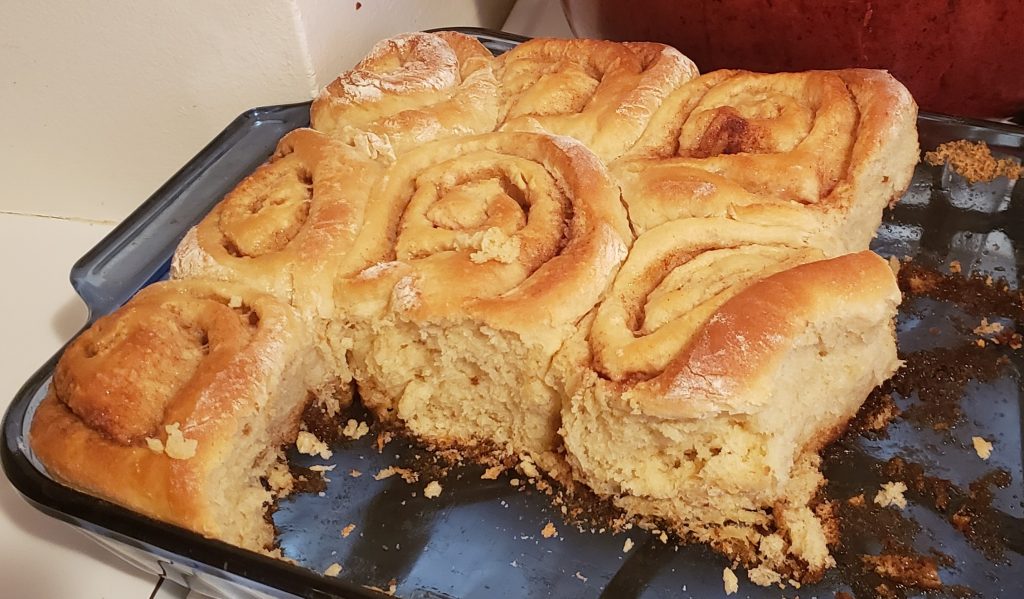
Easy Sweet Rolls
Elizabeth English Steimle
Nothing says comfort to me more than the smell of fresh baked cinnamon rolls. This easy recipe was a fixture of my youth and I enjoy revisiting it now with my kids. This recipe does not call for an overnight rise, providing for more immediate gratification. It lends itself well to young helpers and those newer to baking. Many a pensive afternoon has been turned into something cozy and sweet thanks to these rolls. Enjoy!
Ingredients
- 2 pkgs. dry yeast
- 2 c. warm water
- 1 tsp. salt
- 1/2 c. sugar
- 6 ½ c. sifted flour, divided
- 1/2 c. melted butter
- 2 eggs
- 4 ½ c. sifted flour
For the filling
- additional melted butter
- sugar
- cinnamon
- raisins (optional)
- ½ cup brown sugar
- ½ cup melted butter
- ¼ chopped nuts (optional)
Preparation
- Dissolve the yeast in the warm water and add the salt, sugar and 2 cups sifted flour.
- Beat with an electric mixer for 2 minutes.
- Add the ½ cup melted butter and the eggs and beat another 2 minutes.
- Add 4 ½ cups flour and mix well. Let the dough stand for 20 minutes.
- On a floured surface roll out the dough into an oblong, and then spread it with lots and lots of melted butter; then sprinkle with sugar and cinnamon. Add raisins if you’d like.
- Roll up the dough and cut in 1 ¼ inch slices.
- In the bottom of a 9 x 12 inch baking pan, place at least ½ cup brown sugar, ½ cup melted butter and the nuts if you are using them.
- Put the slices on top of the butter/brown sugar mixture.
- Let the rolls rise for 1 hour or until light.
- Bake in a 350º oven for 20 minutes or until light to medium brown on top.
Makes 2 dozen.
*
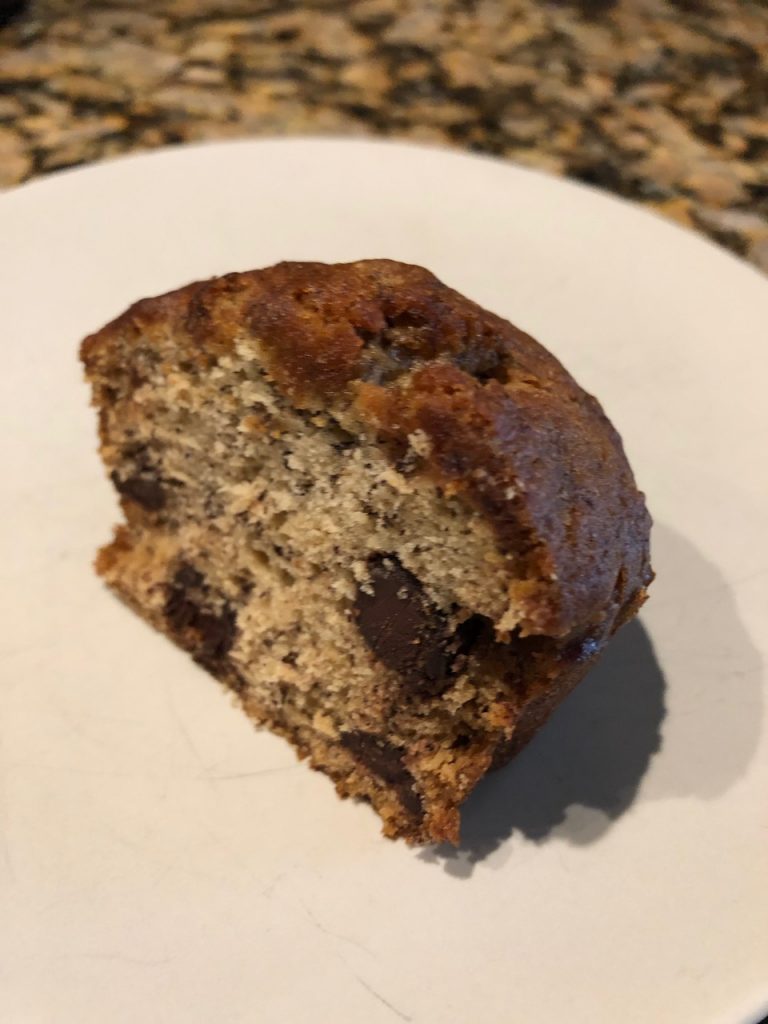
Banande’s (Banana) Bread
Ande Breunig
While I do not consider myself an avid cook, I absolutely love baking! I have been making this banana bread for over a decade and it is always a hit. My husband Sam and I have a running joke-whenever I make it, he tells me it’s my ‘best loaf yet!’ One of the reasons I make it so much is that I am an avid spinner at CycleBar Evanston. They supply riders with a ton of complimentary amenities, including a banana at the end of your workout. Oftentimes I am not particularly hungry after a sweaty spin session, and I end up bringing the banana home; however, since I spin 5-6x per week, the bananas tend to ‘pile up’ before I can eat them…so I turn the ripe ones into delicious bread. I frequently bring my Banande Bread to spin class for other riders to enjoy, and – as a realtor – also bring it to my Open Houses. It’s a fairly easy recipe to make and will leave your home smelling delicious as well!
Ingredients
Preparation
- Heat oven to 350º.
- Spray or butter a loaf pan.
- In a medium bowl, beat together the sugar and butter/margarine.
- Add the eggs and mix well.
- Mix the bananas with the water, and then add to the batter.
- In a large bowl, sift together the remaining dry ingredients.
- Add the banana mixture to the flour mixture and combine with a wooden spoon, then mix for one minute with beaters or a hand mixer.
- Pour the batter into the greased pan.
- Bake for one hour. Remove from the oven and let the bread cool for 10 minutes.
- Serve with butter and/or a sprinkle of cinnamon sugar.
Options
Fold in one cup of your favorite chopped raw fruit in place of one banana. Apples, strawberries, and blueberries work best. Make sure the chopped pieces are very small, and that they are FOLDED into the batter as the last step before putting the bread into the oven.
Feel free to also fold in 1/3 cup chocolate or peanut butter chips for plain banana bread, or 1/3 cup chopped nuts of any kind – again to be folded in as the last step. Yum!